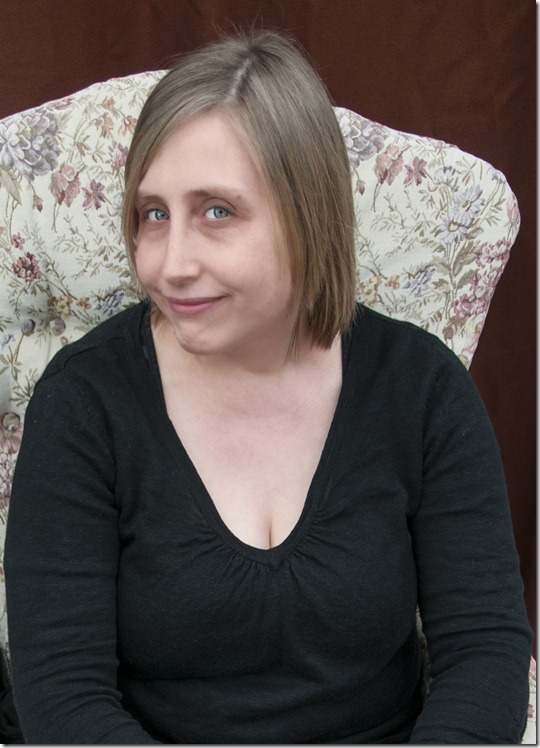
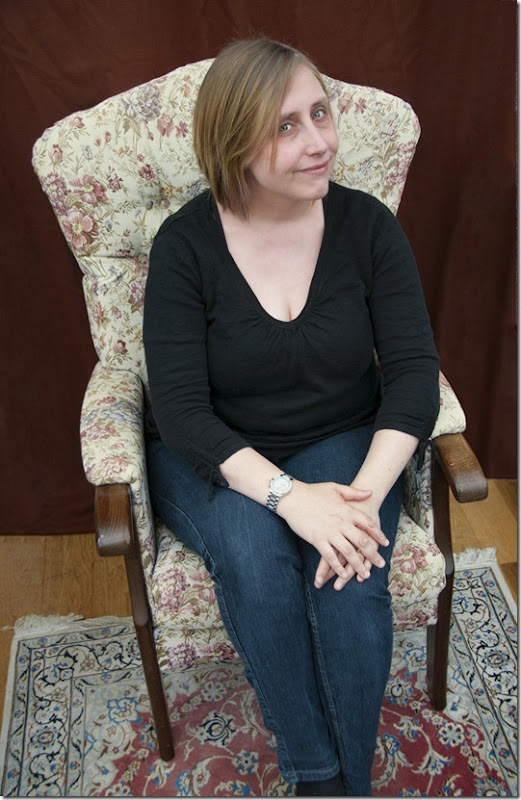
People and Place

This blog is for the learning log and assignments for the third OCA course - People and Place

Wednesday 27 June 2012

Exercise 1.05 – Eye contact and expression

For this exercise I’ve enlisted my younger brother.

I used natural daylight on an overcast day, with light coming from a North facing window, supplemented with fill flash from the diffused mini beauty dish into the shadow areas. The flash was mounted high and to my right, using an adapted microphone stand, and operated remotely using radio sender and receiver system.

I had my camera mounted on a tripod, with the subject framed centrally. I used 3 frame, 0.7 stop bracketing (to have a better selection of images for later selection) with shutter priority and pattern metering. The shutter speed was set at 1/50 sec to accommodate the flash while enabling a reasonable aperture variation for the bracketing and slow continuous shooting mode. I used a cable release which allowed me to interact and instruct more easily. The zoom was set to around 50 mm, to avoid any distortion, knowing that I could then crop the image later for a better framing – I knew he wouldn’t be able to sit still for long!

During this session I took about 90 images, from which I finally selected the following 7 images.

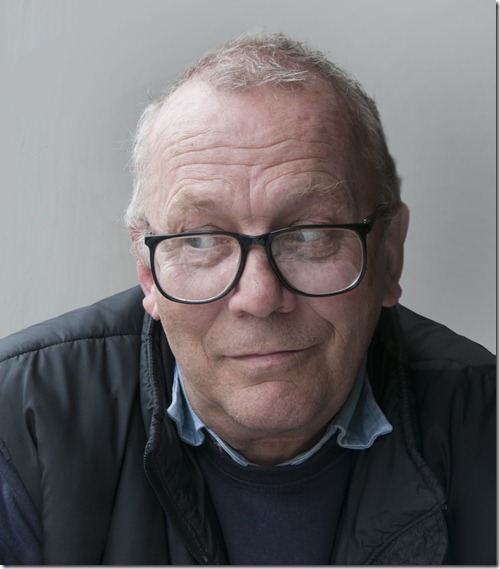
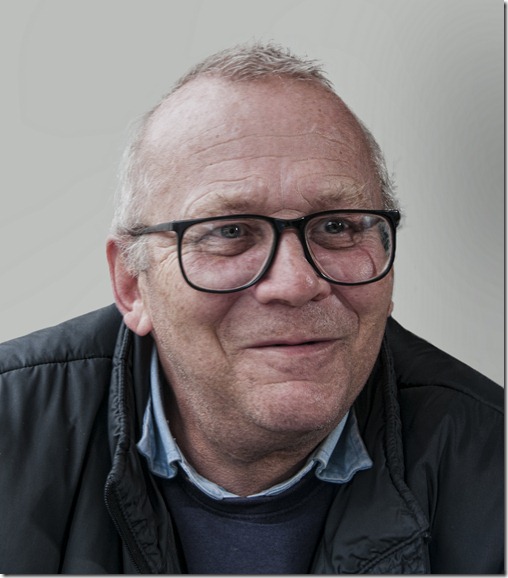
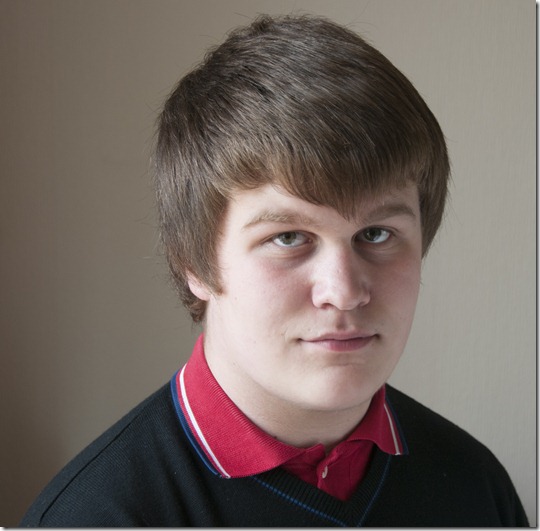
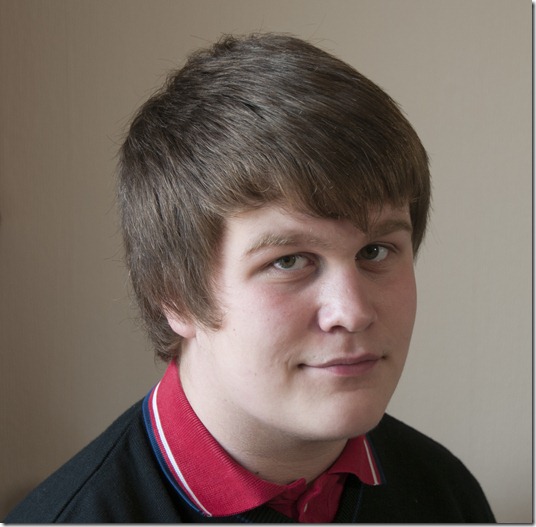
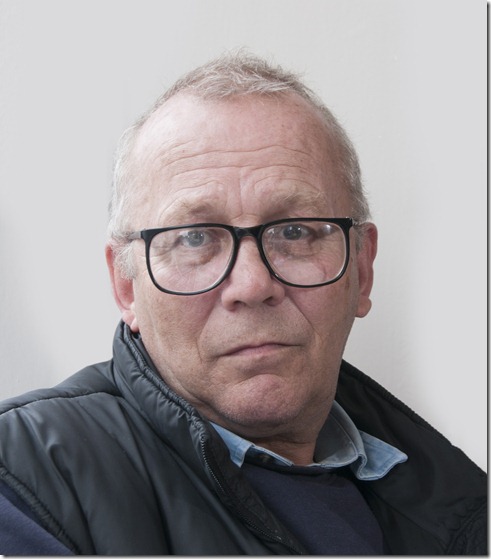
Initially he was apprehensive and this shows clearly on this first image:

Exercise 1.05 01

ISO 200, 56 mm, f/9.0, 1/50 sec.

Looking straight at the camera he is posing as if for a passport photograph. He’s not comfortable and it shows. Not a flattering image, but I think it’s worth seeing the starting point of the session.

His spectacles reflect a lot of annoying lights, and this is evident in some of the following images. In some cases I’ve burned these highlights in the processing, to overcome the problem.

Exercise 1.05 02

ISO 200, 52 mm, f/9.0, 1/50 sec.

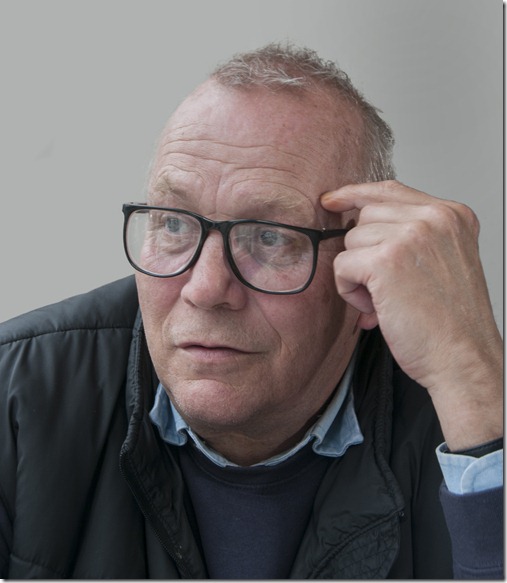
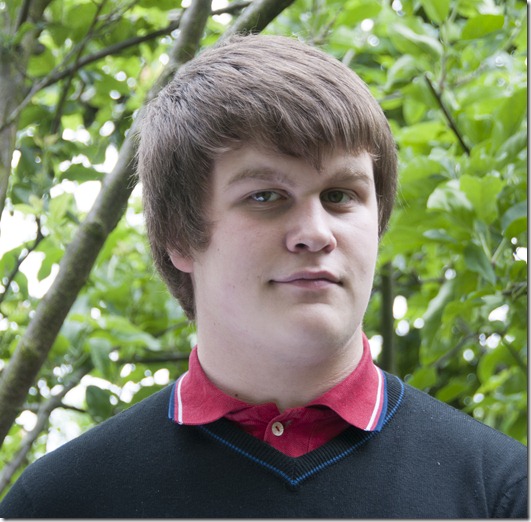
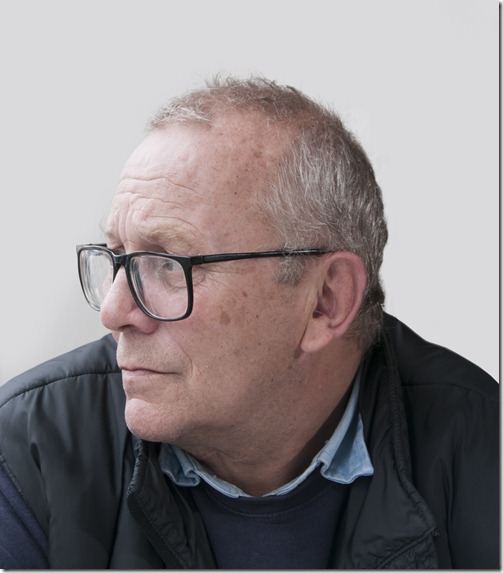
Looking into the light there’s a look of contemplation. He looks as though he’s worrying about something (he probably is!) but I think it’s a good interpretation of one aspect of his personality. This look of contemplation would be an easy one to recall –looking into a soft light source with the head angled towards it would probably do it for most sitters.

I think the fill flash was too strong for this image, particularly where it’s produced a shadow of his ear lobe and collar. Something else I need to watch!

Exercise 1.05 03

ISO 200, 52 mm, f/9.0, 1/50 sec.

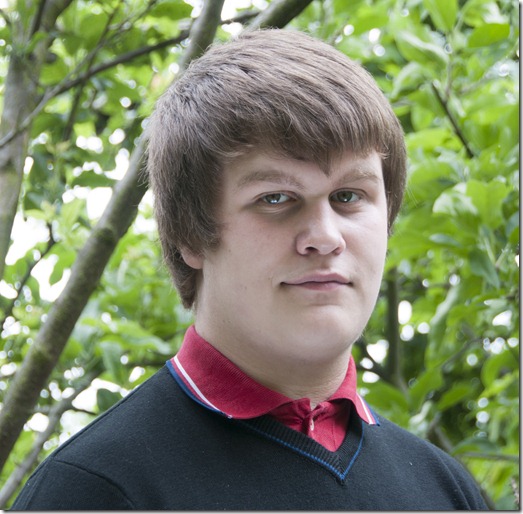
This expression – head facing the camera and eyes to the light – suggests that he’s watching furtively (possibly waiting for an opportunity to get that last cream cake). It’s an effective one to keep in mind.

The fill flash didn’t fire on this image and I’m still happy with the result. The reflections in his spectacles are annoying, but not as much as they would have been with the additional lighting.

Exercise 1.05 04

ISO 200, 52 mm, f/9.0, 1/50 sec.

The thinker – eyes and head turned slightly towards the light and a finger touching the temple – This expression makes him look brighter, maybe because lifting the eyes slightly makes him look as though he’s considering something, and facing the light flattens some of the lines in his face, making it more open.

Again the reflections in his spectacles are annoying – maybe I could persuade him to get non-reflective coatings if he ever considered new ones!

For the next three images, he was looking at me – I was sitting next to the camera – which has made him look to the left of the lens – away from the light. Engaging him in conversation then produced these interesting expressions.

Exercise 1.05 05

ISO 200, 52 mm, f/9.0, 1/50 sec.

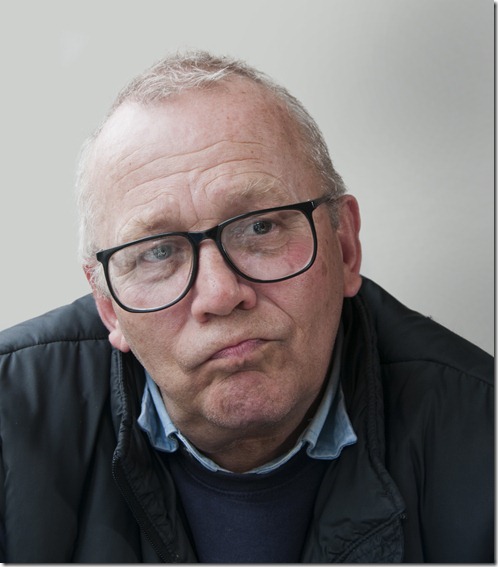
Listening to the proposal – I don’t know how I could replicate this expression, other than cocking the head towards the light, looking slightly away from it and asking him to consider the argument.

By turning his head away from the light, and lifting his head slightly, we can now see his eyes better. The angle of his spectacles has also reduced their reflections, from both the window and the flash. Lifting the head obviously has an impact on the lighting and the expression.

Exercise 1.05 06

ISO 200, 52 mm, f/9.0, 1/50 sec.

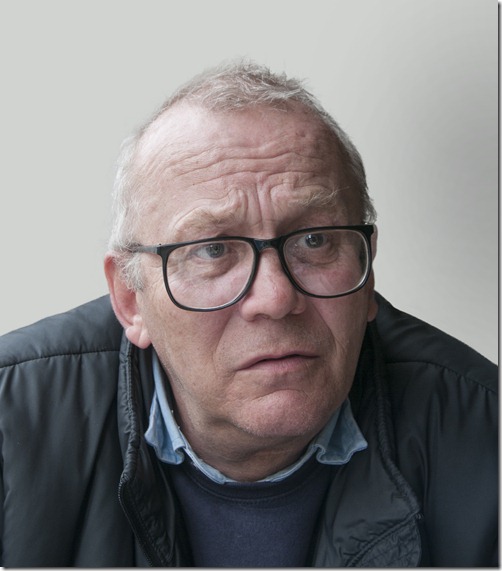
Disbelief – mouth slightly open, looking straight at me while I tell him how serious the result of the argument could be – this is purely down to positioning myself to the right of the camera and spinning a credible yarn.

The same lighting effects as the previous image have again allowed us to see his eyes and reduce the reflections in his spectacles.

Exercise 1.05 07

ISO 200, 52 mm, f/9.0, 1/50 sec.

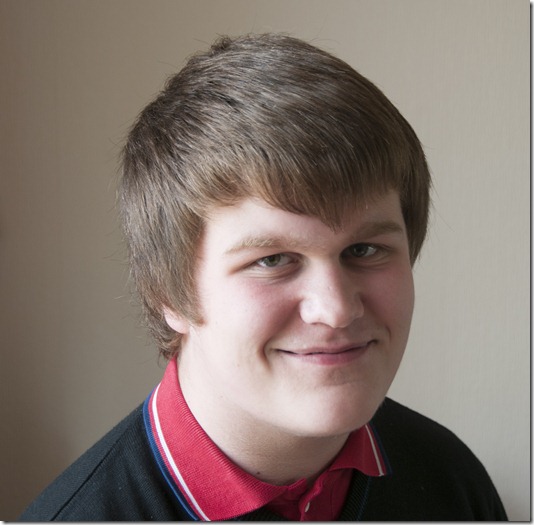
The punchline – The openness of his face and the realization that it’s all been a wind up have made his smile lines show around his mouth and eyes. The eyes are wider and he seems more ‘alive’. The set-up hasn’t changed from the previous two images, just the yarn.

I’d have liked a clearer image, particularly in his eyes – maybe a faster shutter speed would have helped. I burned out some of the reflected highlights in his spectacles, but the shadow created by the flash and the rim of his spectacles is a distraction – maybe some cloning or spot removal could remove it.

I’ve enjoyed this exercise and learned a lot about the importance of camera positioning, lighting and rapport. Maybe I could enjoy portrait photography after all!
Project: Expression

The expression on the face of the sitter has so much influence on the portrait. The expression can be what makes the image more compelling than the physical attributes of the model. Consider Dorothea Lange’s image of the migrant woman:

Dorothea_Lange_Migrant_Mother[4]

Migrant Mother, Nippomo, California, 1936

It’s the worry and concern being shown here that makes the image so compelling.

Her clothing and the conditions she and her children are living in impact on the image, but it’s her expression that draws the reader to the picture.

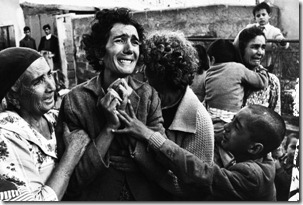
Again, look at Don McCullin’s image of the Turkish Cypriot woman:

McCullin Turkish Cypriot

A Turkish Cypriot woman mourns the death of her husband at Ghaziveram, Cyprus, 1964

This powerful image is all about the expression on her face. It’s that that draws the reader further into the scene and it’s that which initially grabs the attention.

I don’t hope to emulate these renowned photographers, but suffice to say, the expression needs to be considered and built into a portrait if possible.

Sunday 24 June 2012

Exercise 1.04 – An active portrait

Advice on how to get this kind of portrait has already been talked about in earlier sections (particularly from the interviews in the NPG and Michael Freeman of course!), but to reiterate we need to:
· Make the sitter feel at ease – this is about photographing people who know they’re being photographed, so they need to feel comfortable with the photographer as well as the situation. Images of people who are unaware of the picture being taken don’t come into this section.
· Engage them in conversation – try to make them open up and remove any inhibitions. Tell them what the aim of the session is.
· Take lots of images – the more shots there are, the more confident the sitter will become and with digital cameras there should be plenty of storage capacity. We can examine the results at our leisure
· Try to use available lighting – studio lighting and / or flash will be a distraction from the ‘normal’, comfortable known situation which we’re trying for. It may be necessary to increase the ISO setting in lower lighting conditions.
So with these in mind, let’s go for the shoot!
Viv agreed to entertain me in her studio while she was planning a 3D piece for her City and Guilds course.
The lighting was primarily indirect daylight from the window, supplemented by a mix of incandescent and daylight lamps.
I used the ‘Auto ISO’ function with a maximum ISO 800 and a minimum shutter speed of 1/30 sec. I used aperture priority with a wide aperture of f/4.5, as I wanted to concentrate on her face, not the background (which I’d prefer to be out of focus). I wanted to use at least 40mm focal length, to avoid any distortion in her features. The shooting mode was in ‘continuous high speed’ with spot focusing and ‘pattern’ exposure. The VR on the lens was set to ‘active’. These settings allowed the camera to be operated ‘hand held’ so there was less distraction from my equipment and made it easier for her to relax into her work.
I positioned myself on the opposite side of her work table, having decided that this was the position to get the best lighting conditions on her face and agreeing that I wouldn’t be in her way. We talked about what I was trying to capture and what she was also trying to achieve with her piece and then settled down to our tasks.
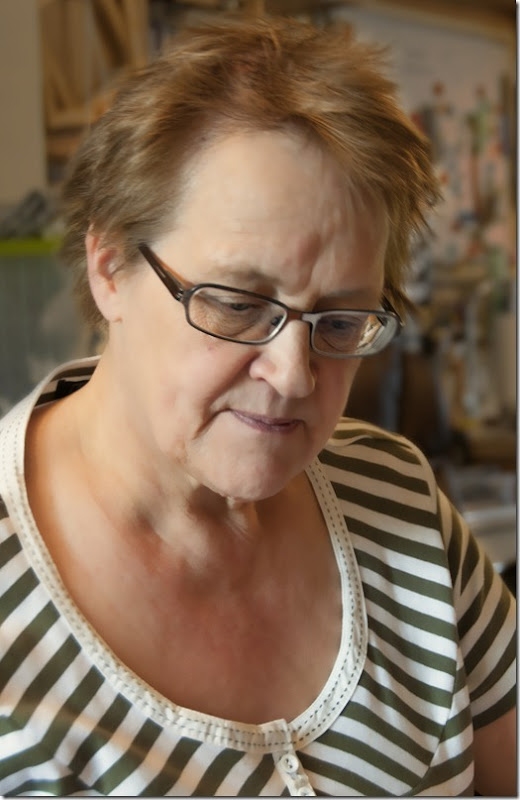
I took 40 images and selected this one as the final one:
Exercise 1.04 01
ISO-360, f/4.5, 1/30 sec. Lens 45 mm (72 mm 35 mm equivalent).
I’m quite pleased with this image. It shows her concentration in her eyes and the set of her mouth. She also seems to be at ease with herself. There are no obvious reflections in her spectacles and the soft natural lighting is right for her complexion. I think it shows her character as well as her physical appearance. I’d marry her again!

Project : Activity

I’ve been quite taken by a section in the Michael Freeman ‘Photographing people’ book – yes I know I keep talking about it, but it’s excellent – about ‘Daily life’ There are several subsections to it, but the capture of people’s portraits as they go about their normal activities shows them as their ‘real selves’. This is what I’d like to try for in this project.
John Szarkowski ‘The Photographer’s Eye’ contains many images of this type mainly in chapters ‘The Frame’ and ‘Time’. They’re predominantly full length images, but still showing individuals at ease with the photographer and their surroundings / activities.
The recommended further reading book ‘Dexter, Emma and Weski, Thomas (Eds). (2003) Cruel and Tender: Photography and the real, Tate publishing’ is prohibitively expensive for me. I’ve ordered it at the local library, but it will be some time before it arrives. In the meantime I’ve been using a pdf document ‘teacher and group leaders’ kit’ for the exhibition which I downloaded from the Tate modern website, along with a video from vimeo.com, so I could identify the photographs and photographers who exhibited at the Tate.
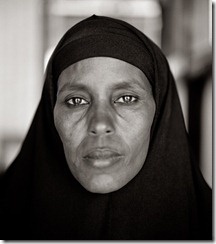
One photograph that I really appreciated was Fasal Sheik’s ‘Abshiro Aden Mohammed, Woman’s Leader, Somali refugee camp, Dagahaley, Kenya 2000’ which he used in his book ‘A camel for the son’.
Fazal Sheik - a camel for the son, 1992
The directness of the woman’s gaze suits the ‘dead centre positioning in the frame and the lighting on such a dark skin really works – the image grabs and holds my attention. There’s so much strength in this woman which has been shown so well in this photograph.
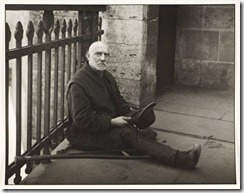
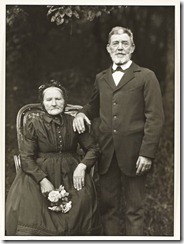
Other portraits in the exhibition, by August Sanders portray the subjects in their surroundings:
August Sander - Beggar 1926
Beggar, 1926
The situation of the beggar is dire, but his expression, poise and dress show him to be a man who is not accustomed to being in this position. The lighting is excellent, softening his features and allowing lots of detail to come through.
The picture tells a thousand words.
August Sander - Farming Couple - Propriety and Harmony, 1912
Farming Couple – Propriety and Harmony, 1912
Here’s a picture of a proud man and his wife.
There’s potentially an interesting story here – The husband is glad to show his position, but his wife obviously isn’t happy to pose. They’re both well groomed and dressed for the photograph, but I get the impression he’d be happier in a boiler-suit and she’d be in an apron.
I think he’s got the lighting wrong here – see how they’re both squinting and their facial features look too harsh. Still – it’s a good record shot and you’ve got to remember the equipment that they’d be using would have been very restrictive.

Monday 18 June 2012

Exercise 1.03 Experimenting with light

My plan is to take portraits with:

· Natural light – the type depends on the weather conditions and will use reflectors / diffusion as appropriate, to get hard and soft lighting conditions, with and without reflectors.

· Fill flash (possibly with additional remote flash / reflector / diffuser)

· Diffused available lighting

In preparation I’ve made two reflectors – one using the shiny side of kitchen foil mounted on a piece of white mount board (so I can use the silvered side or the white side); and the other using gold coloured foil, again on white mount board. I’ve studied the variations of the on-camera flash and also the remote flash (which can be operated using ‘commander’ mode from the camera, or using a radio controlled sender / receiver system). I’ll experiment with the flash attachments / filters / honey combs etc. before subjecting a model to the experience – I’ll document the different settings as I go on.

All images are processed without any changes other than conversion from RAW and cropping. The skin tones, shadows, etc. are as taken by the camera. I could enhance these images in processing, but I feel this would not be the right thing to do for the sake of this exercise.

On an overcast day I took several images of our grandson as follows:

The first three images were taken indoors using natural North light from the window. Camera was tripod mounted, in Aperture priority and centre weighted average metering.

Exercise 1.03 01

18-200 mm lens @ 46mm, f/4.5, 1/15 sec.

This is without any supplementary lighting effects. I think the camera has underexposed slightly and the slow shutter speed has allowed slight movement of the sitter, so it’s not as sharp as I’d like. Maybe a higher ISO and / or bracketing would have helped.

I then used the silver reflector – reflecting light onto the dark side of his face – This light was too strong, so the shadow side of his face was as light as the naturally lit side. Highlights from the reflection were also very prominent. I discarded that image.

Exercise 1.03 02

18-200 mm lens @ 46mm, f/4.5, 1/25 sec.

Turning the silver reflector over to use the white card side has produced a much better result. The shadow side of his face is now much clearer and the portrait gives a much more pleasing, softer representation. The card is visible in his eye highlights, so that’s something which I should watch in the future.

I then tried the gold reflector. Again this was too strong and created an unnaturally coloured glow onto the dark side of his face. Again, the eye highlights showed the reflection of the gold board too much. I rejected that image too.

Next I tried the digital flash mounted approx. 2 metres to the side and in front of the sitter. I fitted it with the mini beauty dish which I fitted with a gold reflector and white diffuser. It was fired remotely, using a radio transmitter / receiver system. I set it up to light from the window side (from my left) but further in front of the sitter, to use it as flash fill. The flash was set into automatic but I reduced its EV by 3.0 to reduce the amount of fill. This had the fill effect I was looking for, but the overall image was over exposed and had too much contrast for my liking, so I rejected that image too.

Exercise 1.03 03

18-200 mm lens @ 46mm, f/4.5, 1/30 sec.

This image uses the same fill flash settings, but with the digital flash set up to fire into the shadow area (from my right). I think this is the best image of the set. The catch light in his eyes and the slightly gold light in the shadow side of his face look good to me. There are gold highlights in his hair too, which make it more pleasing. Controlling the amount of fill flash and diffusing the gold light has worked to keep soft shadows but allow sharpness in his eyes and hair.

We then moved out to the orchard into the shade of the trees, using the leaves to further diffuse the already diffused (by clouds) natural light, where the next two images were taken. The light in the sky was behind the sitter and slightly to my right.

The first image overexposed the lighter parts of his face, probably because of the ‘average’ of the darker areas I the frame. I rejected that image.

I then tried the gold reflector onto the shadow areas to the side of his face, but the gold looked completely wrong in this setting – too obviously artificial, so I rejected this image too.

Exercise 1.03 04

18-200 mm lens @ 62mm, f/4.5, 1/125 sec.

Using the white side of the board to reflect the light was better. The reflection in his right eye is unfortunate. This is something I’m going to have to watch. I’m not very happy with the darkness of his eye socket here either. The light reflection here has created shadows around his collar, so that’s another distraction. I need to be more careful with the strength of light from the reflector and take more notice of the catch lights in the eyes. Obviously these dark locations with backlighting can be a problem with the exposure and amount of reflected light. I could correct some of these points in Photoshop, but that’s not the aim of this exercise.

Using the silver reflector was unsatisfactory as the effect was increased even more. So that image was also rejected.

I then tried using the reflectors from under the face. The gold and silver reflectors were again too bright for this area, so they were rejected.

Exercise 1.03 05

18-200 mm lens @ 62mm, f/4.8, 1/100 sec.

The use of the white reflector board was better, but left the sitter looking quite ashen and did nothing for the darkness in his eyes. The catch lights in his are again in the wrong place and too strong. I’m not happy with the results from these outside shots, but I’ve learned from the exercise.

From this exercise I can see advantages in using reflector boards, but care must be taken in dark situations, as they can so affect the image. Things I’ve learned here are:

· Take notice of the catch lights in the eyes - Use fill flash for better results and look for too much reflection from reflector boards

· Use spot metering rather than average or matrix metering

· Use bracketing to get the best exposure

· Be careful with the amount of reflected light – position reflectors further away if necessary.

· Lighting indoors appears to be much more controllable and gives better results.

Project – Light

The kind of light being used can make a real difference to portrait. Using natural or photographic lighting with or without reflectors, diffusers, filters etc. should be considered when setting up for the shoot.

Michael Freeman’s book ‘Light and lighting’ from the ‘Digital Photography Expert’ series, has sections on ‘Daylight lighting’ where the height and direction of the sun, haze, using clouds as diffusers / reflectors, dawn / dusk, fog etc. are considered; ‘Available artificial lighting’ where the different types of incandescent, fluorescent and vapour discharge lights are discussed; ‘Photographic lighting’ which looks at on camera flash, mains flash, various types of studio lighting, lighting supports, reflectors and diffusers, effects lighting etc. Using this with two of his other books:

‘The Complete Guide to Light & Lighting in Digital Photography’ which looks at the above items in more detail but includes another section - ‘The craft of lighting’ which is very useful when looking at the positioning of lights, use of flash fill and reflectors, backlighting, multiple light sources, softening / sharpening light etc.

‘Photographing people’ from the ‘Digital Photography Expert’ series’ from which a great deal of the text for this course is derived and has a wealth of suggestions and tips relating to the sections in the previous two.

I’ve again looked at John Hedgecoe’s ‘Complete guide to photography’ which suggests lighting conditions for the ‘people’ section.

I don’t have any studio lighting and at this stage I’m not convinced it would be a good investment (that may change), but I do have a digital flash which can be used in remote ‘commander’ mode and has an accessory pack which includes a mini beauty dish with different deflectors, honeycombs and gels and diffuser dome which I may use to enhance existing lighting.

Friday 8 June 2012

Exercise 1.02 – Thinking about location

The range and application of backgrounds for portraits is phenomenal. It would be best to determine the type of portrait and the feelings that are to be displayed before considering the background. However, that’s not the remit here, so for this exercise I decided to give myself some contingency options, in case the weather worked against me. I took three images at home (one indoors) and three away from home.

Looking again at Michael Freeman’s ‘Photographing people’ and particularly the sections on ‘Setting the scene’, ‘The contextual portrait’ and ‘Familiar surroundings’ I’ve realised that some of the locations need further work, which I’ll document and amend when I take the final images.

Points to consider in choosing / preparing a location / background include:

· Does it need tidying?

· Do surfaces need to be cleaned (look for films of dust)

· Are there distracting objects (posters, paintings etc) or words (posters, book covers, signs) – Do you want to keep them?

· Are there any reflective surfaces which could reflect you or your equipment, lights etc.?

· Does it need any additional props or dressing?

· Does it need additional lighting and will that need power points? Is there enough space for them?

· Do the surroundings complement the sitter?

· Keep the sitter away from walls – unwanted shadows can be caused.

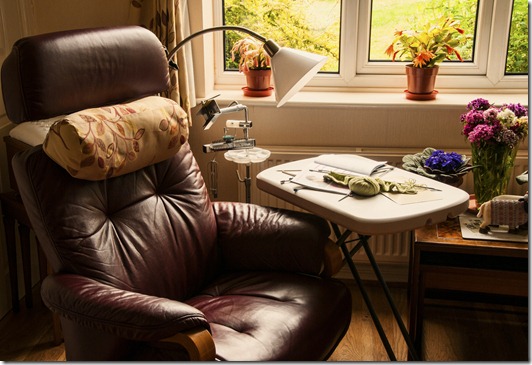
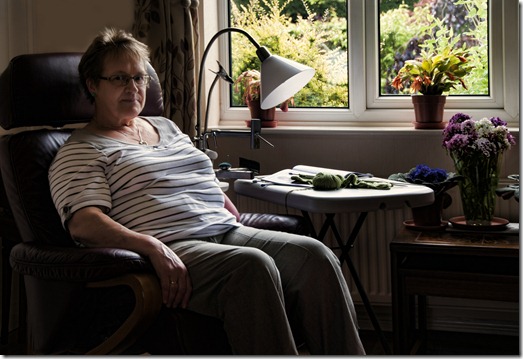
The first location I’ve chosen is my wife’s chair where she sews or knits in the evenings. I’ll use this for a contextual portrait of her.

Exercise 1.02 01

I think this will work best using natural light from the window. The best day to take this would be on an overcast day, or early morning before the sun comes round to the window. This will reduce glare from the white surfaces and give a softer light.

There will be a risk of reflections on the windows if I use artificial lighting. Obviously there’s a possibility of closing the curtains and using artificial lighting – I’ll keep that as an option.

I’ll take the image from the far side of the room, using a longer lens setting to prevent distortion (there’s obviously some here when looking at the vertical lines of the window) and to give a more flattering portrait. A lower shooting angle will also help.

I’ll move the ornaments from the flower table for the shoot and maybe the neck cushion. The items on her side table, the equipment stand and daylight lamp are relevant to the contextual portrait and they’re not taking up too much of the scene, so they can stay. The flowers are so much a part of her life that they must stay too.

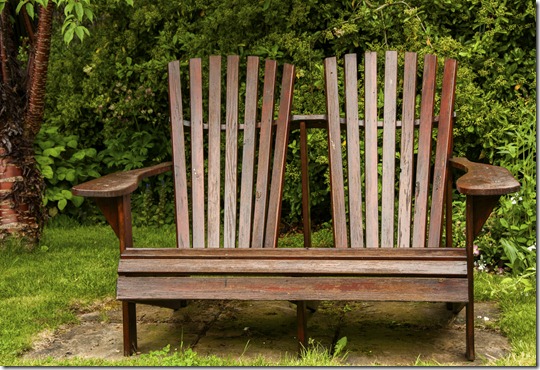
The second image is again taken at home, but this time outside. Again, this could be used for a contextual portrait of my wife, or a general location for any portrait, using one of the chairs in a shadier part of the garden as an aid for the sitter:

Exercise 1.02 02

This seat faces south, so the best time for using it for a portrait would be early morning or late evening when the sun is lower and shining from the right or left of the picture.

There’s some tidying up to do, removing weeds from under the chair and by the tree trunk, and relocating the clematis creeper on the right lawn. It would also be prudent to clean the chair to remove the bird droppings from the chair arms.

I’ll have to be careful with the potential reflection from the struts on the chair back and curved front. I’ll use bracketed shooting mode to overcome this, choosing the best exposure to reduce glare and adjusting the portrait subject exposure to suit, using an adjustment brush in Lightroom or Adobe Raw.

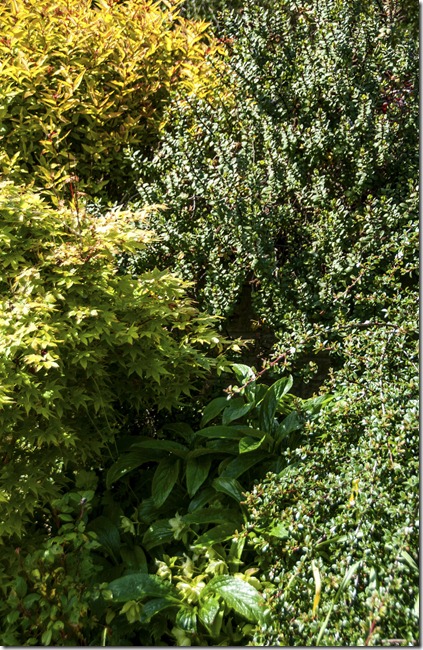
Still in our garden, I’ve chosen a selection of shrubs as a background for similar contextual or general portraits:

Exercise 1.02 03

The different shades of green could work well together as a background. There is some texture here, but this could be muted by using a wide aperture to lessen the depth of field. The background could then be a suggestion of texture with a pleasing range of hues.

This group has a South Eastern aspect, so it would work best with an afternoon sun. I would again use bracketed shooting mode, tobe able to minimize any glare from the shiny leaf surfaces.

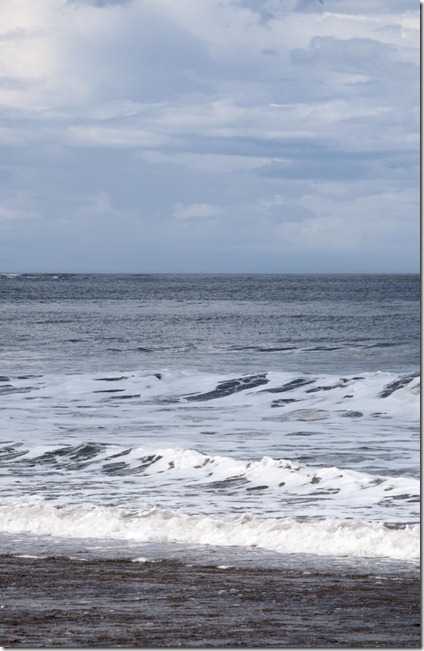
Moving away from the house we go to the coast.

Exercise 1.02 04

The shore can provide such a range of moods, depending on the weather conditions. A clear sky with smooth sea can suggest a calm peaceful location, but this can change to a stormy, grey windswept vista with a completely different aspect – the sea can be whipped up and the skies leaden to impart a threatening, wild scene. The state of the tide can change things again, from a vast area of golden sand or rocky outcrops. There is so much scope for a range of portraits. This one has an overall blue hue, with detail which could again be muted with a wide aperture, so may be good for portraits of hikers or dog walkers.

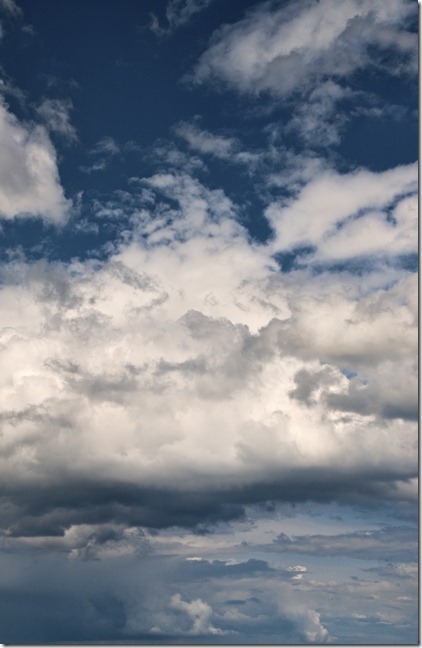
Still at the coast, I turned my attention to the sky:

Exercise 1.02 05

The sky can look so big at the coast, with little to break the sky line. Obviously this vista with a range of blues could be used for a range of portraits. Using the cliffs to position the sitter would make it easy to have the sky as the only background, without angling the camera upwards.

Just as the sea and beach can change, so can the sky. This overall blue can change depending on the weather conditions and the time of year / time of day, to give a huge range of feelings to a portrait – from warm calm sunsets to wild, stormy, black clouds and all points between. It’s all down to the image that is to be portrayed.

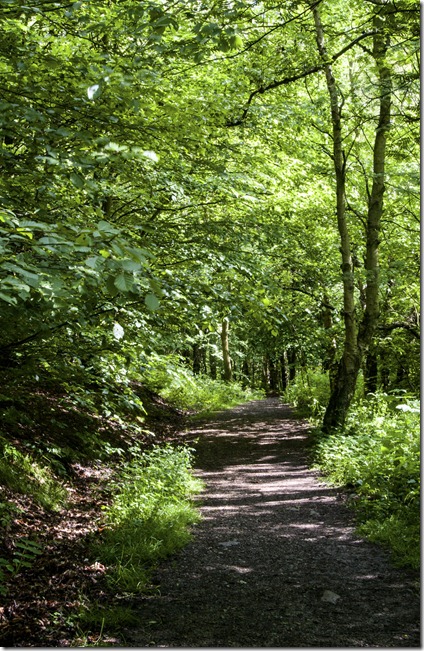
Moving back inland, we move to the forest:

Exercise 1.02 06

With this background there is so much that could be portrayed – from a peaceful ‘mother-nature’ portrait to a secret, babes in the woods look. The overall feeling of seclusion and freshness could provide a very sensuous portrait.

This image was taken mid-afternoon. In early morning, the sun rises from the end of the path, sometimes with a light mist, which gives the location a completely different, magical look.

At the time of day portrayed here, the sitter could be positioned in a light area, so that he / she influenced the metering, to throw the background into dark, which would again change the import of the portrait. Side light from the right could give a pleasing portrait – some cloud cover could give a softer image.

With the weather dictating that outdoor images would be unwise – and forecast to continue unsettled for the immediate future – my best friend agreed to have her portrait taken. Using her favourite chair (I know it’s not the norm, as people tend to slouch in their favourite furniture, but I felt it was right for this image) with the amendments recorded on the preview image, I took this image:

Exercise 1.02 07

ISO 200, f/7.1, 1/125 sec with aperture priority, centre weighted average metering (underexposed by 1 stop to reduce highlight clipping).

I used the brush tool in Lightroom 4 to lighten her face by increasing the exposure 0.9 stops. It’s a portrait that we’re both happy with, and that’s the bottom line!

It was a very worthwhile exercise looking for the locations / backgrounds which highlighted the need to look closely for any potential distractions, to good end!

Project – Settings, backgrounds, locations

Tuesday 5 June 2012

Exercise 1.01 – Portrait scale and setting

Well I started off with good intentions, with a visit to see our daughter and intending to take a series of images for this exercise – not a problem until I looked at the results – nothing wrong with the subject but the background was horrendous. Too cluttered by half, with too much distracting from the subject, so it’s back to the drawing board and read up on how it should be done first.

Talking of reading up, I’ve ordered and received books on reading list sent with the course material and I’ve just noticed that the list refers to ‘The Art of Photography’, which I’ve already completed. Guess I’ll have to phone OCA to sort it out. Anyway, I found a list for this course in the Key resources of the website, so it’s something to be going on with until after the weekend.

Having spoken to OCA and they sent the latest reading list. In the meantime I’ve looked at the books I bought and they’re worth keeping so nothing too much has been lost. I ordered and received boos from the list and had a quick browse through them.

While waiting for reading lists / books etc. I looked at the National Portrait gallery site - http://www.npg.org.uk/learning/digital/interviews-with-artists-and-sitters.php for ideas. Suggestions I’ve found include:

· Interact with the sitters – make them feel at ease with the experience and tell them why and what you’re trying to achieve. This comes across from many of the artists

· Make it a personal thing, to produce an image which shows the personality, not just the physical attributes.

· Try to show what the person is really like, not how he / she would like to be seen. This may be controversial as the sitter would normally pose to say ‘This is who I am and this is what I look like’, so the proposal may not be well received.

· Direct the sitter on pose, position etc.

· Define the type of portrait that’s required – does it need to be in context with the sitter’s work or fame? If so does it need to be taken on location? Is it a close up to show character; torso / full length to show the body beautiful?

Then there’s a question of backgrounds / props:

· It seems to me that many of the monochrome portraits use a very dark background, to give the sitter’s lighter features more attention. Many of the colour portraits use a lighter background (even white), to allow the darker sitter to stand out from it.

· The background can be used to ‘tell a story’ with the sitter just a part of it.

· If the portrait is to be in context, place interesting objects within the frame, to add interest / mystery to the image.

Further reading provided other pointers (Primarily, ‘Photographing people’, Michael Freeman; and ‘Complete guide to Photography’, John Hedgecoe) which should be taken into consideration:

· Planning – Who, when, where, what and why. Generally we’d know who the subject is, but the other pointers can be used to plan the best place, time of day, the type of portrait and what the finished portrait is to be used for. That way the ‘how’ can be considered, so the subject, venue and equipment can be prepared before the shoot. And always try for a contingency, in case things change.

· Check the venue – what is the housekeeping like – does it need cleaning / tidying? Look for reflective surfaces which may impact on the image. Is it too cluttered? Are additional props needed? Consider the lighting requirements.

· Type of lens and depth of field. The subject should stand out from the surroundings, so a wide aperture may be a way of achieving this.

· Consider the lighting – generally a soft light works best, so additional lights should be diffused.

· Rapport – essential from the word go. Without this the shoot just won’t work.

· Expression – How is the subject to be portrayed and how do we get that look?

· Pose and camera position. The range is enormous, but they should be discussed and varied.

· Composition – look for any obvious distractions (lampposts protruding from the head etc.). Is the composition to your satisfaction? Is the lighting right?

· Take lots of frames. With digital cameras there’s no excuse, so take as many as you can. Personally I like continuous shooting mode, as the best images seem to be when the subject has relaxed after the initial shot. It also allows the sitter to relax, as the pose doesn’t need to be held for so long.

So with these points in mind we repeated the exercise, this time during her visit to our house.

I used the conservatory for taking the images, with a blanket over the patio doors to cover any distractions from indoors. The lighting in the conservatory was good for these images – it was an overcast day with a suggestion of light from the East (I enhanced this with a daylight lamp from the same side).

I used the Nikon D300s with the 18-200 mm VR lens (VR turned off). The camera was tripod mounted, in Aperture priority with 3 frame, 1 stop bracketing and centre weighted average metering. ISO was on automatic with a maximum shutter speed of 1/40 sec.

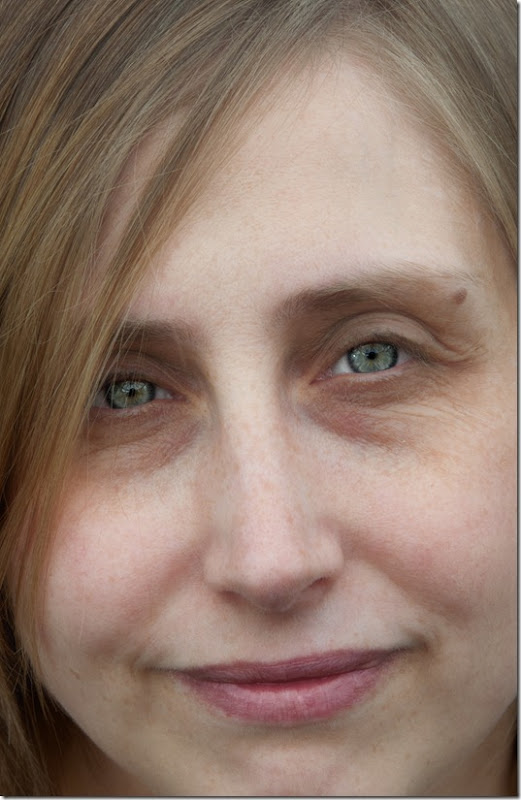
The first image was composed as a close up, ISO 320, 200 mm zoom, f/16, 1/40 sec. The fairly small aperture gave better focus across the whole image.

Exercise 1.01 01

This is my favourite image of the shoot – mainly because of the detail which can be seen in her eyes. For me this is a much more personal image than the following three and shows more of the person that she is.

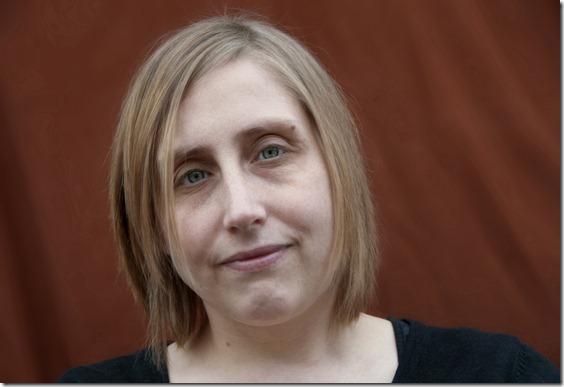
For the second image – head and shoulders – I positioned the camera at a lower angle.

ISO 200, 52 mm zoom, f/4.8, 1/100 sec. The wider aperture was used to throw the background out of focus.

Exercise 1.01 02

Asking her to angle her head slightly worked well for this pose. Again her eyes are the focal point of the image.

For the third image – torso – I asked her to turn her head towards the light, then look at the camera. ISO 200, 26mm zoom, f/3.8, 1/160 sec.

Exercise 1.01 03

A wide aperture was used so that the blanket was thrown out of focus. I changed the camera position so that it was slightly above her which I think has produced an interesting image.

It doesn’t have the same arresting eye / mouth features of the previous two images. She looks more at ease in this framing – more comfortable with herself.

The final framing – full length – was again taken with her seated and with the camera slightly elevated. The camera and lens settings were exactly the same as the previous image, but with the camera moved further away.

Exercise 1.01 04

I think this is the least flattering image of the session. She looks more tense and obviously posing for a photograph.

Where all the preceding images make her seem at ease with the shoot, this one looks too ‘posed’ – whether that’s to do with the type of framing, or my naivety, or her being uncomfortable with the situation I don’t know. I do know it’s something I’ll have to work on.

The feet have been cut off in the framing – this was intentional, as the coloured socks would have been a distraction from the rest of the image.

I think the camera positioning could have been better here too, so that the chair is square in the frame. That’s down to not taking enough notice of faults in the setting up. Maybe the next exercise will make me take more notice of this type of error!

Project: Types of portrait framing

Part one – People aware

Portraiture is an element of photography that I’ve never been really at ease with. I feel that imposing the camera on a person can be such an intrusion and many people just don’t want to be photographed, so it’s a difficult situation for all concerned. It’s also one I’ve got to get to grips with, so there’s trepidation and excitement at the same time. I’ll keep my fingers crossed and face it head on.