People and Place

This blog is for the learning log and assignments for the third OCA course - People and Place

Tuesday 31 July 2012

Assignment 1 – A portrait

The Plan:

Our son has agreed to sit for this assignment, so we’re going to stay with him for the weekend.

Referring to the lessons of this first part, I’m looking for images which show my sitter well in the following criteria:

· Scale and setting, using framing to get the best images, whether they are head and shoulders, upper torso or close framing of the face. This would be a ‘studio’ type set up situation.

· Settings, backgrounds and location, to see the sitter in a setting that suits his clothing and character.

Points to consider in choosing / preparing a location / background include:

o Does it need tidying?

o Do surfaces need to be cleaned (look for films of dust)

o Are there distracting objects (posters, paintings etc) or words (posters, book covers, signs) – Do you want to keep them?

o Are there any reflective surfaces which could reflect you or your equipment, lights etc.?

o Does it need any additional props or dressing?

o Does it need additional lighting and will that need power points? Is there enough space for them?

o Do the surroundings complement the sitter?

o Keep the sitter away from walls – unwanted shadows can be caused.

· I’m looking for contextual images, so setting up in an area where he feels ‘at home’ – maybe in the kitchen or garden or with his computer.

· Using appropriate lighting to produce images that both my sitter and I are happy with. I’ll take my reflector boards and flash gun with the dish / globe and reflector / diffuser attachments and remote control.

· Using a variety of focal length lenses depending on the portrait type, but generally keeping above about 35 mm (50 mm equivalent) to prevent distortion.

· I want an ‘active’ image to show my sitter involved in doing something, so that it’s not an obviously posed image. Maybe playing with his daughter, cooking, enjoying a drink or working on the computer.

· I want to capture my sitter’s natural expressions, to try and show the real person which will be better attained using a longer lens. This could be done with the camera set up and using remote release while we talk.

· Poses should be ones which are flattering and showing his best points. This will depend on how he would like to see himself and what he’s wearing. The garden may be a suitable location for this.

· During each session I’ll refer to the checklist to review the sequence in camera but do the final selections when I return home.

o Is there anything apparently sticking out of the subject’s head?

o Is the general composition satisfactory?

o Is the lighting balance about right?

o What about the angle of the head?

o What does the body language say?

o How is their expression?

o Is there anything I can leave out of the frame?

o Is there anything missing from the picture?

o Do I have the picture yet?

I may not address single criteria in individual images, but will probably use various ones in each session to create portraits we are happy with.

The general plan will be to use three basic sessions:

1. Activity images as he settles in after work or as he plays with his daughter

2. Studio type set up for close work

3. Contextual, expressive, more activity images and posed images in ‘studio’ / garden / around the house.

The reality:

The sessions varied as we went on. The first evening session didn’t work very well, as we had lots of catching up to do and things to prepare for the following day. I had ideas to have a session set up to take his portrait as he enjoyed a beer when he got home, but finding the right position which had the right lighting was difficult to find – I wanted a backlight on the beer glass so the obvious place was in his chair by the window. The images I took were good of him and the backlit beer worked, but the background was too bright and had too much going on (shrubs outside, window catches etc.) I could have removed them and / or blurred them in Photoshop, but that didn’t feel like the right thing to do for this assignment.

The next day we went to Dunham Park, so I identified areas there for portrait settings. On our return to his house we decided to take some contextual images in the garden, so he posed by his barbecue with his new shed as the backdrop. Moving back inside, I took images of him as he played with his daughter, for activity pictures. The ‘studio’ images were taken in his dining room. I used Lightroom 4 to select the final six images, using the star rating and the comparison facility to help in making the final decision. The six images chosen are as follows:

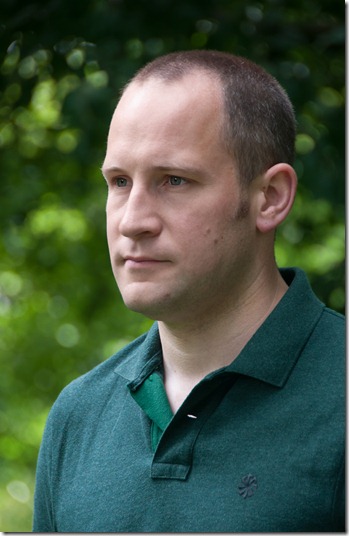
Assignment 1 01

Tight framing

ISO 200, f/5.6, 1/80 sec at 200 mm focal length (300 mm equivalent for 35 mm). Centre weighted metering and spot focusing.

This was taken outside with only the available light. I positioned him in the shade where the light was softer with the camera tripod mounted.

Asking him to turn his head slightly away from the camera then looking straight at me has given a pleasing angle while maintaining good eye contact. Keeping him in the shade has prevented any squinting.

Faults that stand out in this image are:

· His eyes are watering slightly, so this was probably not the best time to take his portrait.

· A better portrait would have been achieved if he’d had a shave.

Maybe some cropping could be used to frame him better, cutting out some of his forehead and his stubble.

Assignment 1 02

Indoors with natural light, diffused flash and white reflector

ISO 200, f/5.6, 1/8 sec at 170 mm focal length (255 mm equivalent for 35 mm). Centre weighted metering and spot focusing.

This was taken indoors using natural light from the window and a remote operated flash fitted with a mini dish and yellow diffuser. The camera was tripod mounted. The flash was in auto and set for -2 EV.

Positioning the flash to my left, well behind me and high up (on a microphone boom stand) has given well positioned highlights in his eyes and given a small amount of shadow. The shadow under his chin was reduced by a white reflector board which he held at chest level.

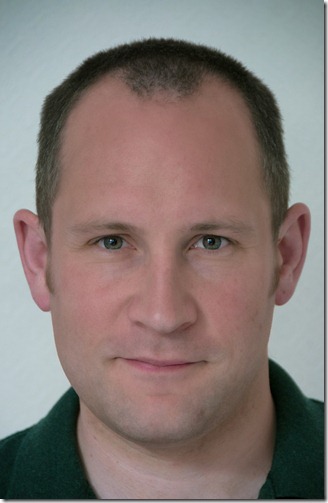
Using the long lens setting has helped create a good likeness here. There’s good eye contact and the slight shadow has given some depth to the portrait. A wide aperture has allowed the background and clothes to go out of focus, to bring attention to his face.

A fault with this image is that he’s facing the camera directly, so it’s saying “I’m having my picture taken!” OK for a passport photograph, but not really showing the ‘real me’.

Assignment 1 03

Outdoors head and shoulder

ISO 200, f/5.6, 1/40 sec at 200 mm focal length (300 mm equivalent for 35 mm). Centre weighted metering and spot focusing.

The camera was tripod mounted. The image was taken in the shade, using only naturally diffused light.

With his body angled and facing towards the light his features show well while the light on his face suggests brightness in his character. Looking into the light reinforces this suggestion.

I think the background is a good choice for this shot – The greens in the background and his shirt contrast with the light of his face.

It could have been improved by using a reflector to reduce the shadow areas under his chin.

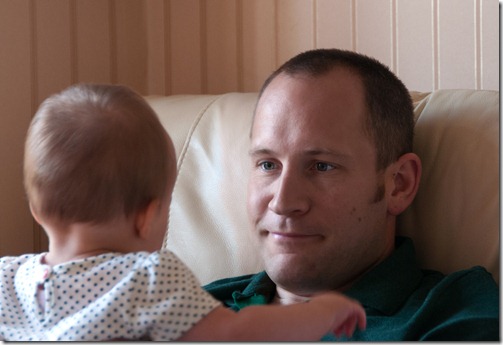
Assignment 1 04

Activity

ISO 640, f/5.3, 1/20 sec at 112 mm focal length (168 mm equivalent for 35 mm). Centre weighted metering and spot focusing.

I increased the ISO setting and engaged the vibration reduction on the lens, to enable a hand held capture of this image. This shows him better as the ‘real person’ absorbed in the love for his daughter. This is my favourite image of the set.

The natural daylight from the window was sufficient at this ISO setting and although there are definite light / shadow sides to his portrait the character shines through.

The background is soft enough to allow the sharpness of his face (particularly his eyes) to be the point of focus. It may have been better with a flatter, maybe slightly darker background, but I think it still works.

The baby is moving and she’s out of focus, but it doesn’t matter – the sitter is what’s important and the suggestion of his daughter is merely a prop to focus the attention.

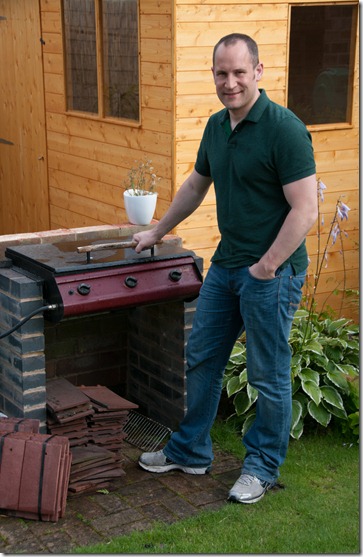
Assignment 1 05

Contextual

ISO 200, f/8, 1/250 sec at 50 mm focal length (75 mm equivalent for 35 mm). Centre weighted metering and spot focusing.

This was another handheld capture. I needed to stand on a low wall to take this image, in order to avoid the imposition of next door’s garage wall in the framing.

The occasion here was the building of the new shed, which he wanted to show us, so posing in front of his barbecue with the new shed in the background shows him in an area he’s very pleased with.

The piles of tiles are the remnants of the original garage which stood where the shed now stands, so it’s quite relevant to leave them in the image. He’s done a lot of work to get this far and he wanted to show it.

Posing with his hand in his pocket makes him look relaxed and comfortable with his surroundings and that’s what this picture is all about.

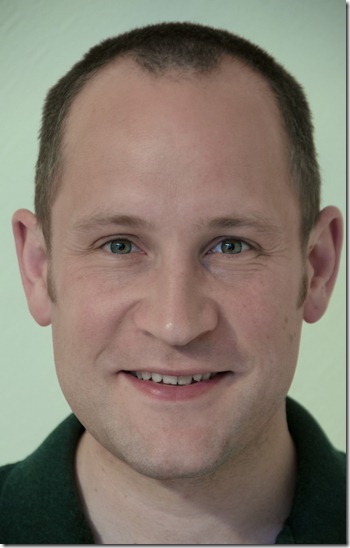
Assignment 1 06

Expression

ISO 200, f/5.6, 1/8 sec at 170 mm focal length (255 mm equivalent for 35 mm). Centre weighted metering and spot focusing.

This was taken indoors using natural light from the window and a remote operated flash fitted with a mini dish and white diffuser. The camera was tripod mounted and set up with a cable release. The flash was in auto and set for -2 EV.

Positioning the flash to my left, well behind me and high up (on a microphone boom stand) has given well positioned highlights in his eyes and given a small amount of shadow.

The advantage of the remote release is that the sitter doesn’t know when the image is going to be captured, so it’s easier to catch him when he’s relaxed and just being himself. Look at the smile lines around his eyes and the brightness in his smile. His eyes sparkle – this is what he’s really like. And that’s what I wanted to capture.

It could be improved by further reducing the amount of flash, and therefore the shadow, but I’m happy that this is a realistic portrait which shows his true character.

General:

With all these images, it’s become clear that I need more practice with this type of image. I need to work on my rapport – to keep it going all the time while adjusting the camera settings etc. Better lighting equipment may help, but gaining more experience with what I’ve already got would be something.

Maybe I should be reviewing the captured images in more detail when on location – I tend to select the best images quite quickly, which dumps the poorer images, but doesn’t necessarily mean that the ones which are kept are perfect by any stretch of the imagination.

I’ve tried to put plans together, but they invariably get changed. I think that using a studio situation may allow for better planning, but other than that I think I can now see when a location / background is going to work, so changes of location are not really that much of a problem. Similarly I can now recognize when the lighting is adequate or when it needs to be enhanced, so again, a fixed plan can be modified to make a location / situation work.
Sunday 22 July 2012

Publications used in this section (not necessarily referenced in the texts but including those above):

Angier, Roswell. 2007 – ‘Train Your Gaze’. 1st edition. Switzerland, AVA publishing SA

ISBN 2-940373-37-X

Badger, Gerry. 2010 –The Genius of Photography. 1st edition. UK, Quadrille Publishing Ltd

ISBN 978-1-84400-609-0

Cotton, Charlotte. 2009 – ‘the photograph as contemporary art’. 2nd edition (First published 2004). UK, Thames and Hudson. ISBN 978-0-500-20401-6

Dyer, Geoff. 2007 – ‘The Ongoing Moment’. First edition. USA, ISBN 978-1-4000-3168-9

Freeman, Michael. 2003 – ‘Light & lighting’ from the ‘Digital Photography Expert’ series’. 1st edition. UK, Ilex. ISBN 1-904705-21-9

Freeman, Michael. 2004 – ‘Photographing people’ from the ‘Digital Photography Expert’ series’. 1st edition. UK, Ilex. ISBN 1-904705-20-0

Freeman, Michael. 2006 – ‘The Complete Guide to Light & Lighting in Digital Photography’.

1st edition. UK, Ilex. ISBN-10 1-904705-88-X

Hedgecoe, John. 2004 – ‘Complete Guide to Photography’. 3rd edition (first published 1990). UK, Collins & Brown. ISBN 1-84340-119-3

Langford, Michael; Fox, Anna; Sawdon Smith, Richard. 2010 – ‘Langford’s Basic Photography’. 9th Edition (first published 1965). UK, Elsevier (Focal Press). ISBN 978-0-240-52168-8

Shore, Stephen. 2007 – ‘The Nature of Photographs’. 2nd edition. UK, Phaidon Press Ltd.

ISBN 978-07148-5904-0

Szarkowski, John. 2009 – ‘The Photographer’s Eye’. 4th edition (first edition 1966). New York.

Museum of Modern Art. ISBN 978-0-87070-527-4

Books and websites referenced during this section:

Books:

Freeman, Michael. 2003 – ‘Light & lighting’ from the ‘Digital Photography Expert’ series’. 1st edition. UK, Ilex. ISBN 1-904705-21-9

Freeman, Michael. 2004 – ‘Photographing people’ from the ‘Digital Photography Expert’ series’. 1st edition. UK, Ilex. ISBN 1-904705-20-0

Freeman, Michael. 2006 – ‘The Complete Guide to Light & Lighting in Digital Photography’.

1st edition. UK, Ilex. ISBN-10 1-904705-88-X

Hedgecoe, John. 2004 – ‘Complete Guide to Photography’. 3rd edition (first published 1990). UK, Collins & Brown. ISBN 1-84340-119-3

Langford, Michael; Fox, Anna; Sawdon Smith, Richard. 2010 – ‘Langford’s Basic Photography’. 9th Edition (first published 1965). UK, Elsevier (Focal Press). ISBN 978-0-240-52168-8

Smith, Jeff. 2011, ‘Posing for portrait photography’, 2nd edition, USA, Amherst Media Inc.

ISBN-13: 978-1608953141

Szarkowski, John. 2009 – ‘The Photographer’s Eye’. 4th edition (first edition 1966). New York.

Museum of Modern Art. ISBN 978-0-87070-527-4

Websites:

National Portrait Gallery interviews with artists and sitters. Available from:

http://www.npg.org.uk/learning/digital/interviews-with-artists-and-sitters.php

[Accessed 25th May – 3rd June]

Cruel and Tender: Photography and the real – teacher and guides’ kit – Available from: http://www.tate.org.uk/search/cruel%20and%20tender

[Accessed 22nd June]

Media:

Fasal Sheik’s website reference to his photograph ‘A camel for the son’

http://www.fazalsheikh.org/projects/a_camel_for_the_son/description.php

[Accessed 22nd June]

Video of the book ‘Cruel and Tender: Photography and the real – low quality but a reasonable overview. Available from:

http://vimeo.com/channels/ls1/16978071

[Accessed 22nd June]

Tate gallery – August Sander images

http://www.tate.org.uk/art/artworks/sander-beggar-al00107

[Accessed 22nd June]

History today – Don McCullin image of a Turkish Cypriot woman

http://www.historytoday.com/blog/2011/10/shaped-war-photographs-don-mccullin

[Accessed 23rd June]

Cleary Gallery blog for Dorothea Lange image ‘Migrant Mother, Nippomo, California’, 1936

http://clearygallery.blogspot.co.uk/2012/05/photographic-mother-day.html

[Accessed 23rd June]

Learning Evaluation

I’ve gained a lot of confidence with this part of the course and learned a lot about framing, lighting (particularly reflectors and diffused flash), composition, rapport, backgrounds, positioning of the sitter and the effects of different poses.

My initial trepidation with this type of photography has been allayed to some degree, to the extent that I’m reasonably happy about taking portraits if required. Whether or not I move into this area seriously remains to be seen. It would require an investment into lighting equipment and setting up a studio, so it’s unlikely just now. However, it’s not out of the question.

I’m pleased I embarked on this voyage. It’s made me look into aspects which I’ve been avoiding. It’s also reminded me that I should concentrate on the job in hand and be more vigilant regarding what’s in the frame (or isn’t)!

Exercise 1.08 – Varying the pose

I’ve looked at several magazines – primarily Practical Photographer and Digital Camera – and also studied the ‘Posing for portrait photography’ and ‘Photographing people’ books already mentioned, to consider the poses being made for portraiture. The general groups of posing include: standing, sitting, squatting, lying, kneeling, crouching, and all fours (cat crawling).

It’s worth considering the body language portrayed in each of the poses, which could change the whole connotation of the image, so care must be taken when suggesting the positions.

The location and props will also affect the message of the image.

The shooting angle and camera position can also change the presentation of an image, so this can be varied in the session, to give a more varied selection.

I’m going to use standing, sitting and lying for this exercise.

Some poses that could be used within these main groups are:

Standing:

· Hands on hips – high and low shooting angles – This can display dominance or anger.

· Arms behind back – stay away from me.

· Hands in pockets – showing an easy come / easy go stance

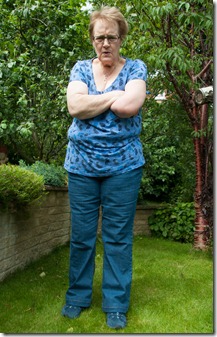
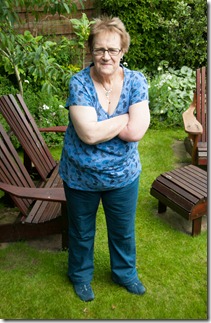
· Arms folded – high and low shooting angles – Can show displeasure or judgement.

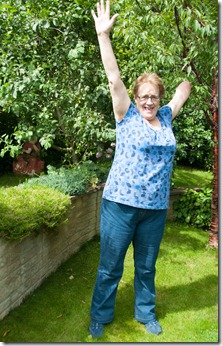
· Arms high and wide – make the triangle – displays a carefree, happy situation.

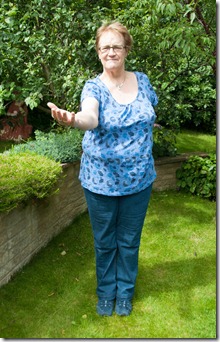
· Arms outstretched towards camera (palms up) arms together / apart – straight or high shooting angle. Displays openness or pleading depending on the expression

· Legs together / legs apart can change the meaning of any of the above poses.

· The angle that the torso is held can change the appearance of bust and waist lines.

Sitting:

What the model is sitting on affects the possibilities – sitting in front of a table offers different poses than using a chair only, sitting on steps can offer more situations (sprawling back, pulling the knees in and resting the head etc.

Considering the use of a straight chair with no other prop we could have:

· Sitting straight on to the camera – knees together and hands on lap. This could portray primness or insecurity.

· Legs crossed / arms folded – Defensive.

· Legs apart – hands on knees - Openness

· Arm over the back of the chair – comfortable and easy going.

· Arms apart towards camera– high shooting angle – inviting or pleading.

· Arms towards camera – offering or presenting

· Chin in hand – contemplating

· Hand on chin - suspicious

· Hand behind neck - stressed

· Chair turned round – legs apart / arms on chair back – interested but protected.

Lying:

In the supine position (laying on the back)

· Arms to the side or crossed on the chest, legs straight out and staring straight up – almost the death position - may suit Goths, but not a generally accepted portrait position.

· Hands locked behind the head and looking straight up – contemplative

· One arm behind the head with the other across the waist and one knee raised – relaxed

In the prone position (laying on the front) and / or body on one side

· Head and shoulders lifted on elbows, or with the chin supported by both hands – could look fun or cheeky, but interested.

· Arms folded and legs bent at knees and crossed – relaxed and inviting

· Body twisted to face the camera, on one elbow, or chin supported by one hand – interested / inviting

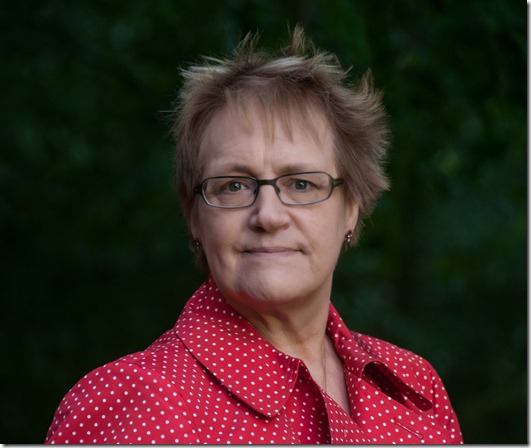
I planned to use our grand-daughter for the session, but I wasn’t happy about posting images of her on the internet – she’s only 13 and there are lots of opportunists out there. Viv again agreed to be my guinea pig for this exercise. As you’ll see, some of the poses I’ve suggested above won’t work for her, as she was born without a left hand.

We needed an area where a fairly long lens could be used, so as soon as the weather permitted we went to the bottom of our garden. I decided that the lighting would probably be OK, with a light cloud cover and using the shade of the trees, which made it easier for moving around as she posed.

We started with the standing poses:

exercise 1.08 01 

Using the existing props

Having something to do with the hands makes it easier to pose. She’s probably too square on to the camera in this image and the dappled light on her face isn’t good, but it’s a starting point and tells me that I must think more about what I should be looking for as well as setting up the poses.

Framing for an upper torso and head image would have been better than a full length shot.

f/4.5, 1/800 sec, 24 mm (35 mm equivalent: 36 mm)

exercise 1.08 02

Hand on hip

This pose lifts her bust and thins her waist. Turning her body away from the camera helps this.

Maybe her head was held too far back. The lighting could have been better too.

f/4.5, 1/800 sec, 24 mm (35 mm equivalent: 36 mm)

exercise 1.08 03

Hand on hip 2

The same set-up as the previous shot, but the tighter framing on this image now shows the arrogant ‘look at me’ pose much better.

Using the longer lens setting has made the image much more flattering.

f/4.5, 1/1250 sec, 46 mm (35 mm equivalent: 69 mm)

exercise 1.08 04

Hand in pocket

This gives a much more casual look. She’s looking more relaxed and getting into the session now. Again, twisting away from the camera has flattened her stomach.

Leaving her thumb outside the pocket tends to make her looked relaxed rather than slovenly if it were completely hidden – this may not work the same for male portraits.

f/4.5, 1/800 sec, 26 mm (35 mm equivalent: 39 mm)

exercise 1.08 05

Arms outstretched

This pose has flattened her figure considerably. Using a longer lens would have made it much better too, but the advantages of this type of position are obvious.

f/4.5, 1/800 sec, 22 mm (35 mm equivalent: 33 mm)

exercise 1.08 06

Arm outstretched

The expression on her face with this pose shows openness and welcome. A different facial expression could change it into a pleading look.

The lens is far too wide for this shot, making her hand look too big. I should have moved her out of the direct sunlight too.

f/4.5, 1/800 sec, 22 mm (35 mm equivalent: 33 mm)

exercise 1.08 07

Arms folded with low shooting angle

This image shows displeasure.

The low shooting angle and wide lens setting make her legs look longer.

f/4.5, 1/800 sec, 20 mm (35 mm equivalent: 30 mm)

exercise 1.08 08

Arms folded with high shooting angle

This angle has made her legs look shorter. The displeasure has been lost because she can’t stop smiling. It’s just a fun image and not one that would be a credible portrait shot.

f/4.5, 1/800 sec, 32 mm (35 mm equivalent: 48 mm)

exercise 1.08 09

Hand on hip – high shooting angle

Again, this high shooting angle has shortened her legs and made her upper body look over heavy. The twist of her body is nullified by the effect of this shooting angle. It’s another fun shot, but not suitable for a portrait (even if she is enjoying herself!)

f/4.5, 1/640 sec, 28 mm (35 mm equivalent: 42 mm)

The sitting poses are as follows:

exercise 1.08 10

Knees together. Hand on lap

All prim and proper. She means business so don’t mess with me! Sitting high on the arm of the seat has made her look more domineering.

The ‘normal’ lens setting and shooting angle have brought her features back to normality.

f/4.5, 1/800 sec, 34 mm (35 mm equivalent: 51 mm)

exercise 1.08 11

Knees slightly apart. Hands on knees

While she doesn’t look comfortable with this pose, I think it shows her as being more interested in the viewer. The look is much more direct than in the previous image.

f/4.5, 1/640 sec, 34 mm (35 mm equivalent: 51 mm)

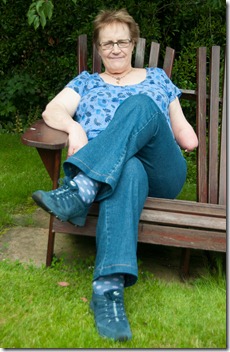
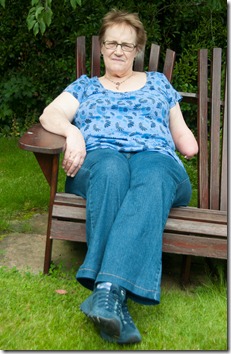
exercise 1.08 12

Legs crossed – open. Sitting high

This pose makes her look more confident and in command. The shooting angle and pose work well for her figure too.

f/4.5, 1/800 sec, 34 mm (35 mm equivalent: 51 mm)

exercise 1.08 13

Legs crossed – open 2. Sitting high

The shooting angle and pose work well for her figure, but she doesn’t look comfortable, so the image doesn’t work as well as the previous one.

f/4.5, 1/800 sec, 34 mm (35 mm equivalent: 51 mm)

exercise 1.08 14

Knees apart – hand on knee

Not the most complimentary of looks, so not one I’ll be revisiting.

f/4.5, 1/800 sec, 34 mm (35 mm equivalent: 51 mm)

exercise 1.08 15

Sitting low. Knees apart. Arm supported

She looks much more comfortable here, so more relaxed. This pose and shooting angle work well for her figure. If the sun hadn’t brightened as much and with some diffused side lighting, this could have made a good image.

The longer lens setting has made her features more realistic.

f/4.5, 1/500 sec, 42 mm (35 mm equivalent: 63 mm)

exercise 1.08 16

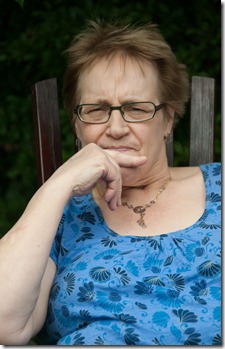
Hand supporting chin – close cropping

I like the realism of this image. The longer lens setting and the cropping work well. It’s a shame that the sunlight has made her squint slightly.

f/4.5, 1/800 sec, 130 mm (35 mm equivalent: 195 mm)

exercise 1.08 17

Contemplative

As with the previous image, the pose and camera settings work well. She looks comfortable and relaxed. I think this image shows her character well.

f/4.5, 1/800 sec, 130 mm (35 mm equivalent: 195 mm)

exercise 1.08 18

Sitting low – legs crossed

Having the arm support has made her look comfortable and confident. The pose is good for her figure. The lens setting has prevented any distortion. I like the result.

f/4.5, 1/800 sec, 35 mm (35 mm equivalent: 52 mm)


exercise 1.08 19

Sitting low – ankles crossed

The same comments apply as for the previous image, except that it’s not as flattering for her figure. Nevertheless, it’s still a good portrait pose.

f/4.5, 1/640 sec, 35 mm (35 mm equivalent: 52 mm)

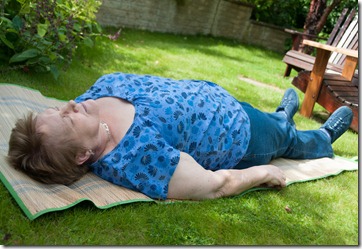
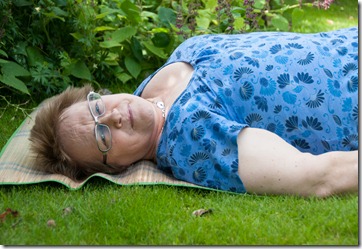
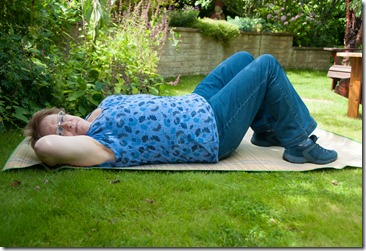
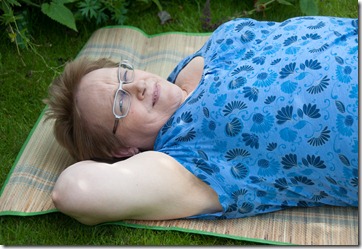
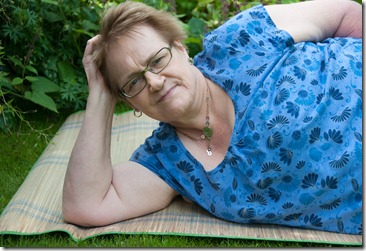
The lying position images follow. The wet ground meant that the beach mat had to be used:

exercise 1.08 20

Supine at rest

The shooting angle here is not at all complimentary. I don’t think it would be from any angle, but worth the experiment.

f/4.5, 1/640 sec, 28 mm (35 mm equivalent: 42 mm)

exercise 1.08 21

Supine facing camera

This is slightly better, but still not one to revisit.

f/4.5, 1/250 sec, 62 mm (35 mm equivalent: 93 mm)

exercise 1.08 22

Supine facing camera with arm behind head and knees raised

This doesn’t work either. I tried several shooting angles but none were satisfactory at this lens setting.

f/4.5, 1/500 sec, 28 mm (35 mm equivalent: 42 mm)

exercise 1.08 23

Supine with arm behind head and high shooting angle

This is better. It’s the only image from all the supine position ones which has potential. Maybe with more subdued lighting this pose could work.
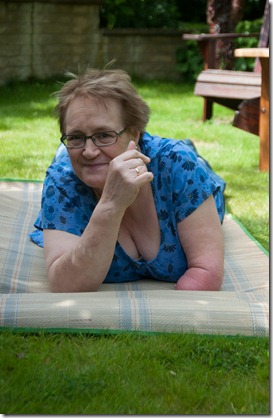
f/4.5, 1/500 sec, 62 mm (35 mm equivalent: 93 mm)

exercise 1.08 24

On her side with arm supporting the head

Turning her head away from the sun has stopped the squinting. She’s been very sporting but the discomfort is starting to show.

f/4.5, 1/320 sec, 56 mm (35 mm equivalent: 84 mm)

exercise 1.08 25

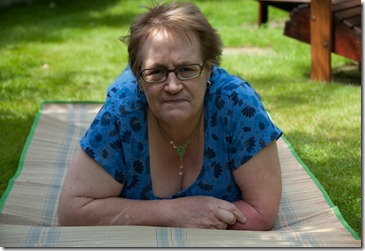
Prone position – supported by both elbows

This is much better. It’s complimentary for her figure and the light isn’t in her eyes. The much longer lens setting shows her features without distortion. With all these prone position images it was important to advise her of the depth of cleavage being displayed.

f/4.5, 1/800 sec, 70 mm (35 mm equivalent: 105 mm)

exercise 1.08 26

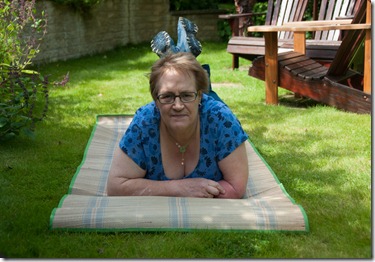
Prone position – supported by both elbows with ankles raised and crossed

This is much better. Again, it’s complimentary for her figure and the light isn’t in her eyes. Raising the legs has brought jauntiness to the image – the camera angle could be better, so it doesn’t look as though her feet are coming out of her head.

f/4.5, 1/800 sec, 40 mm (35 mm equivalent: 60 mm)

exercise 1.08 27

Prone position with legs raised and chin supported

This works well too. The movement of her feet is a distraction but that’s just another point to consider for the future. I still like this pose.

f/4.5, 1/640 sec, 70 mm (35 mm equivalent: 105 mm)

exercise 1.08 28

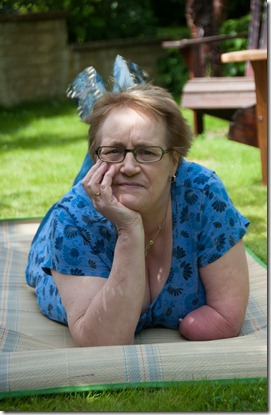
Prone position with hand moved away from the chin

This pose just happened. I like the way it’s moved her head slightly to the side. It’s got a cheeky look to it that really suits her.

f/4.5, 1/640 sec, 62 mm (35 mm equivalent: 93 mm)

exercise 1.08 29

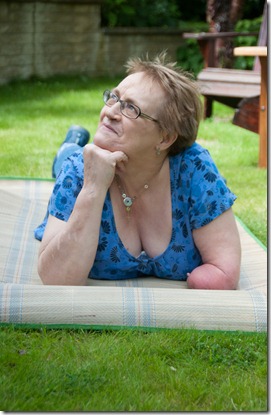
Prone position with hand supporting the chin and head turned towards the light

Turning towards the light has a good effect on her face, but she’s grown a foot from her right shoulder – must take more care!

f/4.5, 1/400 sec, 62 mm (35 mm equivalent: 93 mm)

It’s been an interesting exercise, with some surprises and a lot of reminders about the attention which needs to be paid to the job in hand. I’m sure that the mistakes I’ve made here can be learnt from when it comes to the assignment.

Friday 20 July 2012

Project: Pose and stance

There are so many different poses that suggest different meanings. The body language can change the feeling of a portrait. The shooting angle, expression, lighting and background all affect the message that is being portrayed in the image. The required message would need to be ascertained before the portrait session is started. Fashion and glamour photography have other ranges of poses, which I don’t intend to use here. What I’m looking for are the poses that work best for the model I’m photographing.

I’ve looked at lots of websites which give instruction on poses for portraiture and while some give advice their results are less than average and it seems that everyone has their own opinion regarding what’s best, so I’m not convinced there’s a right or a wrong way to pose for a portrait. I’ve seen that good looking models can have their portrait ruined by using the wrong pose and that some ‘not so attractive’ sitters can be made to look stunning with the right positioning, so it needs to be researched further.

Reading Smith, Jeff, ‘Posing for portrait photography’, he proposes that the traditional ‘artistic’ poses should not be strictly adhered to – choose instead the poses which the sitter would like to see. After all, if you want to sell a portrait, the subject is probably the one who will be buying it – and that’s the bottom line. Think about what the sitter would like to be seen as! Never mind what judges may be saying – it’s the sitter’s opinion that really counts! One thing he extolls is the keeping of a pose record book, so that there’s a basis for starting a session – if there are modifications to the ones being shown, record that too.

So it’s down to what’s required for the portrait – Are we looking for an image that the sitter is going to be happy with? Are we looking to show a figure to its best advantage? Are we looking for a particular expression? Are we trying to portray the sitter’s character? Is it for a business display, a family album or a glamour shot for a loved one? These requirements all demand different approaches, locations, backgrounds, clothing (or lack of it) and equipment. This needs to be defined before the session.

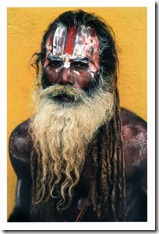
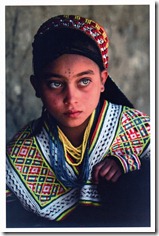
During our break, centred on Wiltshire, I revisited the Fox Talbot museum in Lacock. It’s always worth a visit. This year’s exhibition displays some of the photographs by Basil Pao during his travels with Michael Palin. No ephemera were available, other than a few postcards, but they give an impression of the standard of images being displayed:
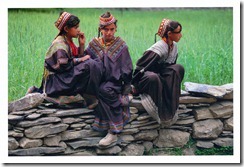
Pashupatinath, Kathmandu, Nepal                              Rumbur 2, Northwest Pakistan                       

Pashupatinath, Kathmandu, Nepal                           Rumbur, Northwest Pakistan

Rumbur, Northwest Pakistan

Rumbur, Northwest Pakistan

The quality of these scanned images doesn’t do justice to the prints on display, but they give some idea of the portraiture to be seen and the ability of the photographer to engage these people and use the light to its best advantage. The portraits portray the characters of these people with no obvious posing for the camera. The backgrounds are unobtrusive and suit the subjects well.

Sunday 1 July 2012

Exercise 1.07 – Focal length

For the focal length part of this project I’ve again looked at Michael Freeman ‘Photographing People’ book at the section ‘Lens focal length’. This explains that wider angles may be useful if perspective is required in the portrait, but there will be some distortion in close features. Longer telephoto lenses will produce more realistic, more flattering images.

Langford’s Basic Photography gives a good explanation of the focal length relating to the ‘normal’ 50 mm lens for a 35 mm camera – this relates to 28 mm for the DSLR, so zoom settings above that should produce very little distortion.

Planning:

I’ll be using two lenses for this exercise:

· Nikkor 18 – 200 mm f/ 3.5 – 5.6 VR

· Sigma 10 – 20 mm

Knowing how much distortion will be evident on the wide lens, I’ll get my sitter to angle her head to one side – it should produce some interesting results!

Starting with the 18 – 200 mm lens, I’ll use settings of 200 mm, 100 mm, 50 mm – (I expect little distortion at these settings) – 30 mm and 18 mm. After changing the lenses I’ll then use settings of 20 mm, 15 mm and 10 mm. With the head angled centre / left / right for each lens setting, it should provide at least 24 images for the exercise.

The session:

After waiting for 3 days for favourable weather conditions, I decided to use Sneaton forest as the location. Viv and I set off early, to avoid other visitors to the attraction. The choice of Sneaton forest was due to the windy conditions at home, with no change for the better in the forecast – at least it was dry. The weather was partially cloudy, but the leaf cover should provide a reasonably steady light to work with.

The forest was much darker than I had expected – there was more leaf cover and it was earlier in the day, but with the additional flash and reflectors it should be OK.

I set up the remote flash with a white reflector and yellow diffuser on the mini beauty dish. I managed to drop the dish – I bent it slightly and snapped a clip off the diffuser – this should be remembered for next time: always set up the stands securely, before mounting the lights. The flash stand is a modified microphone stand, which allows it to be set up at height of about 2.5 m with the boom fully extended.

I positioned the gold reflector board behind Viv, to hopefully give some highlights in her hair. This was set up on a spare tripod fitted with a bulldog clip.

The camera was tripod mounted in shutter priority (for the flash), pattern metering and single shot exposure.

Following the plan, I took the images at 200 mm, 95 mm, 50 mm, 29 mm and 18 mm using the Nikkor 18 – 200 mm lens then 20 mm, 14 mm and 10 mm with the Sigma 10 – 20 mm lens, as follows:

Exercise 1.07 01

200 mm, ISO 200, f/5.6, 1/50 sec.

I like this picture. It’s a good likeness and she looks comfortable with the situation. With this setting I’m not crowding her by being too close.

The backdrop is quite dark here – I assume it’s because the camera is exposing for less light as a smaller sample is being used by the metering.

Exercise 1.07 02

95 mm, ISO 200, f/5.3, 1/50 sec.

Another good likeness and all in proportion as expected. The background is slightly lighter, probably because the aperture and angle of view are wider, so more areas are being sampled. Moving closer into her space, she doesn’t seem as happy with the situation.

Exercise 1.07 03

50 mm, ISO 200, f/4.8, 1/50 sec.

I like this picture too. It’s still in a good likeness and she seems comfortable with the shoot. The background is lighter again as the angle and aperture widen, which lifts the image.

Exercise 1.07 04

29 mm, ISO 200, f/4, 1/50 sec.

Moving closer still, the wider aperture available at this zoom is allowing more light to the sensor – probably a little too much for my liking. Maybe I should have bracketed to allow for this. Her features are still in proportion but she seems to be getting a little concerned about the proximity of the camera (now less than a metre from her).

Exercise 1.07 05

18 mm, ISO 200, f/3.5, 1/50 sec.

The proportions are wrong here. Her head is too wide and her nose too long. She also seems to have a very large shoulder. We can see more of her surroundings, but the lighting on her face from the flash is too bright. Again, bracketing may have helped, but her features are wrongly depicted here.

Exercise 1.07 06

20 mm, ISO 200, f/5.6, 1/50 sec.

Changing to the Sigma lens, with a smaller aperture at this setting has reduced the lightness of her face, but obviously her features are wrong. The smaller aperture has also allowed a slightly better depth of field for the background. The camera was 0.5 m from her face here, so there’s serious encroachment here and she’s not comfortable. I’m not happy with the results of this shot.

Exercise 1.07 07

14 mm, ISO 200, f/4.8, 1/50 sec.

Closer still and her features are being portrayed worse again. Her chin and nose look too big and she’s not comfortable with the camera being so close. There’s too much distortion altogether – but we can see more of the background. I had to remove the reflector board here because it was coming into view in the frame and was too distracting.

Exercise 1.07 08

10 mm, ISO 200, f/4, 1/50 sec.

The wider angle and aperture have produced an over exposed image with features that are now totally wrong. Her face is too wide and her shoulders too big. She’s not happy with the camera as close as it is and I’m not happy with the shot.

Having gone through the exercise I then fell back and took some more portraits which I think have turned out really well – Just as I’d expect from a good sport and a lovely lady.

It’s been interesting to see how the exposure is affected by the aperture setting as the zoom is made wider. In future it may be worth ether bracketing the images or using the auto-ISO facility. I could have reduced the amount of flash manually, or used TTL metering in commander mode, but I think that would have been poor at the close shooting range.

Anyway, it was an interesting exercise and I’ve gained more confidence with taking portraits.

Exercise 1.06 – Review a portrait sequence.

I’ll be using the workflow developed in the ‘Digital Photographic Practice’ course, which worked for me, to work through the images in this exercise. I should have done this using the previous exercise photographs, as I went through them in a similar fashion as part of my normal workflow.

The exercise asks for a rating system of ‘a’ to ‘d’ with ‘d’ being the best image. I’ll be using Lightroom 4 for my importing / cataloguing etc., and using its star rating system so 4 stars will be the best image.

Planning:

I’ve been using the reviewing method on the computer as a matter of course as I’ve done the other exercises, so it’s a shame I didn’t take the opportunity to use the previous images to complete this, before I deleted those which were not to be used – must read ahead more in the future! This time I’ll use the following ‘Exercise 1.07 – focal length’ for both exercises.

As I’ll be doing this exercise in conjunction with the next, I need a situation where I can move a significant distance away from the sitter, so depending on the weather I’ll use the Sneaton Forest backdrop if it’s bright sunshine in the morning (we need to be there before the hordes arrive), as the leaf cover will soften the light. If it’s overcast I’ll use the seating area in our garden.

I’ll use the remote flash with a mini beauty dish for shadow fill and take my reflectors to use as required.

I anticipate taking at least 24 images, but probably more as I try to capture ‘The one’.

The session:

After waiting days for the weather to break, we set off early to Sneaton forest – not because of the light but because of the wind – it was too breezy to use our garden, so the shelter of the forest was the obvious choice.

As the object of the exercise was to vary the focal lengths I reviewed the images after each zoom setting – varying between 3 and 5 frames per set. This helped the session flow without too many stops. I reviewed the images using the checklist in the ‘Photographing people’ book:

· Is there anything apparently sticking out of the subject’s head?

· Is the general composition satisfactory?

· Is the lighting balance about right?

· What about the angle of the head?

· What does the body language say?

· How is their expression?

· Is there anything I can leave out of the frame?

· Is there anything missing from the picture?

· Do I have the picture yet?

In some cases I retook an image if I wasn’t happy with result.

I took the images as per the plan, with a few additional frames during the main exercise and then some extras after completing the programme.

When I’d captured these images we decided that it was time to leave – it was getting busier with dog walkers and hikers which were distracting and we had to wait for them to pass before taking the next frame. The main exercise had been completed, plus a few ‘extras’ and we were also getting cold and needed breakfast! I’d also captured what I thought were good pictures that portrayed Viv well.

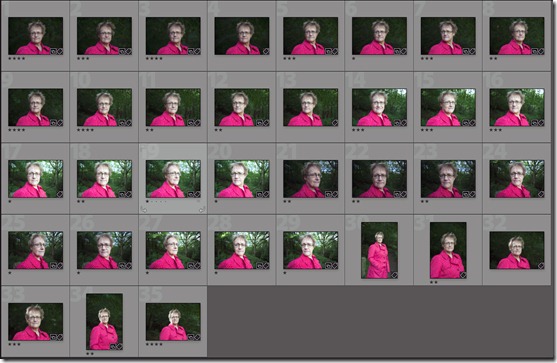
These are the 35 images I captured:

Exercise 1.06 01

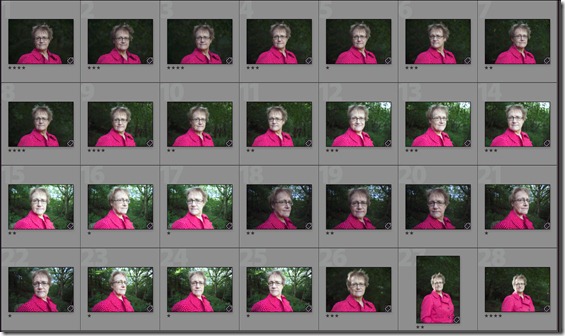
These were further reduced by selecting the best images from each focal length set so that there was only one of each pose per set, plus the ‘extras’ as follows:

Exercise 1.06 02

They have been ranked by stars, with the higher number being the better.

The review at home was much easier than the ‘on location’ review because:

· The computer screen is much bigger so more detail can be seen.

· The resolution is far greater than the camera LCD, so decisions can be made on post processing and saving / discarding of any image.

· It’s easier to compare images, so selecting the best is much easier. Lightroom is excellent for the comparisons and ranking of a sequence.

The ‘on location’ review is useful for getting the image right, before ending the session, but the review on the computer is much better for deciding which images are best and which to save for post processing and / or future presentation.

Project: A portrait sequence

Looking again at Michael Freeman’s ‘Photographing People’ and specifically at the section ‘Sequence and selection’, the text in the course material obviously comes from there. In the book, the text is expanded slightly, so the review checklist also includes:

· Is there anything missing from the picture?

· Do I have the picture yet?

The last question here is the crucial one – once the picture is in the bag there’s an opportunity to experiment more, without any pressure on the photographer or the sitter, so better images may result.

The course material suggests checking each image when it’s been taken, whereas the book suggests checking them after every 4 frames or so – I think the book option will be the better, as the reduced checking periods will put less stress on the sitter and make the whole situation more relaxed.

This part is very similar to the workflow exercise from ‘Photography 1: Digital Photographic Practice’, and I intend to use this as the basis for the reviewing exercise.